Saturday, 28 March 2020

PyInstaller Extractor updated to v2.0

PyInstaller Extractor has been updated to version 2.0. This has been long overdue. The project is now migrated to GitHub and all further development will take place over there.

https://github.com/extremecoders-re/pyinstxtractor

Version 2.0 includes support for Python 3.7 and above. Earlier, the script used to generate invalid pyc files when extracting exe's generated from Python 3.7. This was because from Python 3.7 onward, the pyc header format slightly changed.

Also starting from this version, I am moving away from traditional version numbering. Instead you can always find the latest version on GitHub.

Sunday, 2 February 2020

(Finally) Solving the Weasel keygenme


Back in 2016, kao posted the weasel keygenme on Tuts4you. It consisted of two parts - a custom VM in C# and some crypto. The VM implemented the main logic of the keygenme. In my previous writeup about the challenge, I succeeded in partially solving the challenge by devirtualizing the VM. The crypto part was left unsolved. This was mainly because the crypto logic was way too complex and without special algorithms there was no way to have a go at it. As described in my earlier post, even SAT solvers have no luck in cracking the crypto.

However this time after nearly 4 years I am happy to say that I did manage to break the crypto. In this blog post I will describe the process to solve this keygenme along with all the failed attempts.

Initially I planned to post the write-up on this blog but the blogger platform is not too good for handling equations and mathematical terms. Hence I have left the write-up as an IPython notebook on Google Colab which has been embedded as a GitHub Gist below. In case the preview below doesn't load properly on your browser you can always find the original notebook on Colab.

https://colab.research.google.com/gist/extremecoders-re/cc268753b6d25017fe0cff7299ad9be3/-finally-solving-the-weasel-keygenme.ipynb

The keygen can be found on GitHub

Wednesday, 16 May 2018

Go-dispatch-proxy: A load balancing proxy written in Go

This will be my first post of 2018. I've been very busy these days and didn't have the time to devote to this blog, that was the reason for the prolonged absence of activity. Anyway, in this post, I want to present a tool which I've been working on for some days. It's not related to RE or something fancy. It's just a tool to load balance network connections across multiple interfaces.

To cut a long story short, I have multiple internet connections on my Windows desktop. I needed a tool which would help to utilise all those connections effectively to give an improved speed. In case if multiple connections (i.e. routes) are available, the default behaviour of Windows is to select the one which has a lower metric. If all routes have the same metric, Windows will select one and ignore the rest. [To change the interface metric manually have a look here]

To workaround this problem we can use a load balancer proxy. The purpose of the proxy would be to distribute our connections across the available interfaces leading to increased throughput. There is a project on GitHub - dispatch-proxy which is based on the same idea. It works but I dislike the fact that its written in Node.js. A seemingly innocuous command npm install can wreak havoc on the hard disk by creating tons of tiny files and fragmenting the file system in the process. Naturally, I have an aversion towards desktop apps which are written using node and friends.

Based on the idea I've written SOCKS5 load balancing proxy in pure Go with no additional dependencies.


The binary consists of just a single file which you can get from the appveyor CI server. It works on Windows and fulfils my purpose. It has not been tested on macOS but will likely work. However, it won't work on Linux. This is because the tool works by changing the source IP address for the outgoing packets. On Windows changing the source IP makes the outgoing packet to use the corresponding interface. On Linux, the packet is transmitted according to the kernels routing table and specifying the source IP has no effect.

To conclude this short post, here are a couple of screenshots showing the tool in action.

Listing the available interfaces

SOCKS proxy at work
SOCKS proxy at work

Saturday, 2 December 2017

Reversing a PyInstaller based ransomware

Occasionally, I get questions about how to unpack PyInstaller executables using pyinstxtractor, how to identify the script of interest among the bunch of extracted files etc. In this post, I intend to cover all of these. Let's get started.

The file for our purpose is a recently identified ransomware having the following SHA256 hash.

Sample Hash: 53854221c6c1fa513d6ecf83385518dbd8b0afefd9661f6ad831a5acf33c0f8e
Download from Mega (Password: infected)

Preliminary Analysis

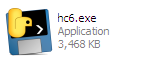
The executable "hc6.exe" has the following icon. The icon itself is a tell-tale sign that it's a PyInstaller executable.
Figure 1: Icon
Another way we can identify such files is by dropping it in a hex editor. A PyInstaller generated executable has many strings referencing python, towards the end of the binary.

Figure 2: Strings

A PyInstaller executable consists of two parts - a bootloader and a zlib archive appended to it as an overlay. The purpose of the loader is to set up the Python environment for running the application. This includes loading the Python DLL from the filesystem or from memory when the DLL is bundled within the executable. After going through a series of operations, finally it executes the main script and the control is transferred to user code. The loader also sets up hooks for resolving imports which are embedded within, the details of which are beyond the scope of this post. You can refer to the source for more information.

Extracting

Knowing that the sample is a PyInstaller generated executable we can proceed to extract its contents using pyinstxtractor as shown in Figure 3.

Figure 3: Running pyinstxtractor
The latest version (1.9) of pyinstxtractor shows which scripts are the possible entry points to the application. These are the python scripts which are run when the application is launched. Naturally, we want to begin our analysis from here. In this sample, it has identified  pyiboot01_bootstrap and hc6 as the entry points. Among the two, the former is PyInstaller specific and not of interest. The other one named hc6 does sound interesting. Let's have a look at the contents of the extracted directory before analyzing the file hc6.

Figure 4: The extracted contents
Within the extracted directory we can see a bunch of stuff - DLL files, Python C Extensions (PYD) and also a sub-directory out00-PYZ.pyz_extracted. This nested sub-directory just contains compiled python files (PYC) as shown in Figure 5. The pyc files are from the standard python library or from a 3rd party library such as PyCrypto. Hence, in this sample, we can exclude these files from analysis.

Figure 5: pyc files inside the pyz

Decompiling the main script

The main script or the entry script is named hc6, let's have a look in a hex editor.

Figure 6: hc6 in a hex editor
This does not look like python code, does it? However, this was not the case in earlier versions of PyInstaller, where the main script was left as-is, in plain text. Recent versions, compile the py source to bytecode before packaging it in the executable.

We now want to decompile this bytecode file back to python source, however, in its present form a decompiler wouldn't recognize this as a valid pyc file. The reason for this is that the magic value (i.e. the signature) is missing from this file header. A Python 2.7 pyc file begins with the bytes 03 F3 0D 0A followed by a four-byte timestamp indicating when this file was compiled. We can add these 8 bytes as shown in Figure 7.

Figure 7: Adding the missing header
With the above changes, we can now feed this file to a decompiler such as pycdc. In case you do not want to compile yourself, I have provided precompiled binaries at AppVeyor. Decompiling we get back the source.

Analyzing the ransomware

Finally, we can have a look at the ransomware in all its glory. It encrypts files from the following list of extensions.
.txt, .exe,  .php, .pl, .7z, .rar, .m4a, .wma, .avi, .wmv, .csv, .d3dbsp, .sc2save, .sie, .sum, .ibank, .t13, .t12, .qdf, .gdb, .tax, .pkpass, .bc6, .bc7, .bkp, .qic, .bkf, .sidn, .sidd, .mddata, .itl, .itdb, .icxs, .hvpl, .hplg, .hkdb, .mdbackup, .syncdb, .gho, .cas, .svg, .map, .wmo, .itm, .sb, .fos, .mcgame, .vdf, .ztmp, .sis, .sid, .ncf, .menu, .layout, .dmp, .blob, .esm, .001, .vtf, .dazip, .fpk, .mlx, .kf, .iwd, .vpk, .tor, .psk, .rim, .w3x, .fsh, .ntl, .arch00, .lvl, .snx, .cfr, .ff, .vpp_pc, .lrf, .m2, .mcmeta, .vfs0, .mpqge, .kdb, .db0, .mp3, .upx, .rofl, .hkx, .bar, .upk, .das, .iwi, .litemod, .asset, .forge, .ltx, .bsa, .apk, .re4, .sav, .lbf, .slm, .bik, .epk, .rgss3a, .pak, .big, .unity3d, .wotreplay, .xxx, .desc, .py, .m3u, .flv, .js, .css, .rb, .png, .jpeg, .p7c, .p7b, .p12, .pfx, .pem, .crt, .cer, .der, .x3f, .srw, .pef, .ptx, .r3d, .rw2, .rwl, .raw, .raf, .orf, .nrw, .mrwref, .mef, .erf, .kdc, .dcr, .cr2, .crw, .bay, .sr2, .srf, .arw, .3fr, .dng, .jpeg, .jpg, .cdr, .indd, .ai, .eps, .pdf, .pdd, .psd, .dbfv, .mdf, .wb2, .rtf, .wpd, .dxg, .xf, .dwg, .pst, .accdb, .mdb, .pptm, .pptx, .ppt, .xlk, .xlsb, .xlsm, .xlsx, .xls, .wps, .docm, .docx, .doc, .odb, .odc, .odm, .odp, .ods, .odt, .sql, .zip, .tar, .tar.gz, .tgz, .biz, .ocx, .html, .htm, .3gp, .srt, .cpp, .mid, .mkv, .mov, .asf, .mpeg, .vob, .mpg, .fla, .swf, .wav, .qcow2, .vdi, .vmdk, .vmx, .gpg, .aes, .ARC, .PAQ, .tar.bz2, .tbk, .bak, .djv, .djvu, .bmp, .cgm, .tif, .tiff, .NEF, .cmd, .class, .jar, .java, .asp, .brd, .sch, .dch, .dip, .vbs, .asm, .pas, .ldf, .ibd, .MYI, .MYD, .frm, .dbf, .SQLITEDB, .SQLITE3, .asc, .lay6, .lay, .ms11 (Security copy), .sldm, .sldx, .ppsm, .ppsx, .ppam, .docb, .mml, .sxm, .otg, .slk, .xlw, .xlt, .xlm, .xlc, .dif, .stc, .sxc, .ots, .ods, .hwp, .dotm, .dotx, .docm, .DOT, .max, .xml, .uot, .stw, .sxw, .ott, .csr, .key, wallet.dat
Encrypted files have an extension of .fucku appended to the original filename. This can be seen in the decompiled code as shown below.

Figure 8: Supported extensions
Files are encrypted with the AES cipher in CBC mode with a random IV generated per file.

Figure 9: Files are encrypted using AES

AES is no doubt a strong algorithm and infeasible to crack. However, the ransomware encrypts each file using a constant and hardcoded key which makes decryption feasible. This is shown in the figure below. The AES key used is j<L;G|hD*3CQk%I!g|Ei&#aQ6*;Vh,

Figure 10: Look, the password is hardcoded!

Decrypting encrypted files

Since we know that each files are encrypted with the same key we can develop a decrypter. However, our kind ransomware author has spared us the bother by providing the decrypter in the same code.

Figure 11: Bundled decrypter

The function decrypt decrypts an encrypted file. It's not called from anywhere, indicating it was there for testing purposes and was not removed in the final build.

There is no need to pay the ransom if someone is infected by this ransomware. A free decrypter is available from the malware hunter team. Kudos to them for their fabulous work!

Wednesday, 29 November 2017

Pyinstaller Extractor updated to v1.9

PyInstaller Extractor has been updated to v1.9. The features of this release includes:

  • Support for Pyinstaller 3.3
  • Display the scripts which are run at entry point 

Support for Pyinstaller 3.3

Self explanatory. For extending the support to Pyinstaller 3.3 no major changes had to be introduced. The earlier script works as-is.

Display the scripts which are run at entry point

A Pyinstaller executable have many embedded files in it. Naturally, users of this tool had difficulty identifying which of the extracted files are of interest. With this update, pyinstxtractor now shows a list of python scripts which are run by the executable at load time. An example is shown in the screenshot below.


pyiboot01_bootstrap and main are the scripts which are run at load time. Out of this two, the former is Pyinstaller specific and not interesting for our purpose. Hence you should start the analysis from the file named main located within the _extracted directory.

As usual, pyinstxtractor can be found at SourceForge.

Monday, 27 November 2017

TUCTF Write-up - RE track


TU CTF is an introductory CTF for teams that want to build their experience. We will have the standard categories of Web, Forensics, Crypto, RE, and Exploit, as well as some other categories we don't want to reveal just yet. If you have any questions, our contact is at the bottom of each page, but please read the official rules before sending us any emails.
This is a write-up for the Reversing challenges in TU CTF 2017.

Funmail [25]

Figure 1: Challenge description
This is straightforward. The challenge requires a password which is hardcoded within the binary as shown in the Figure 2.

Figure 2: Hardcoded password

Monday, 20 November 2017

bnpy - A python architecture plugin for Binary Ninja

Recently I got a chance to try out Vector 35's Binary Ninja, and I must say the experience has been great so far. The good thing about binary ninja (binja henceforth) is its API, we can easily custom plugins for various purposes such as a disassembler for a foreign architecture. We can do the same in IDA, but developing processor plugins in IDA is not for the faint of heart. At the moment, binja is  entirely a static analysis tool but we do have plugins like binjatron that attempts to fill this void.

Playing with the binja API, I developed bnpy - a disassembler for python bytecode. In the binja terminology this is called as an Architecture plugin. At the moment it works for raw python bytecode, i.e. you must extract the instruction stream from a pyc file in order to use it.

In the near future, I plan to extend it so that it can disassemble a pyc (compiled python) file right out of the box. Right now, this is difficult due to certain limitations in the API. To understand this we need to know a bit more about the pyc format.

The pyc file is not a flat file format like a PE or ELF.  It is a nested format bearing a tree-like structure. A pyc file contains a single top-level code object. Among other things, a code object stores an array of constants used by the code. This array is called as co_consts. The constants can be integers, strings and even another nested code object. The code object also stores the bytecode instructions in a string named as co_code. At the moment, the bnpy plugin operates on this instruction string. To better describe the structure of pyc files we can refer to  the following image taken from kaitai struct.

Fig. 1: The structure of a pyc file
You can see, the code objects within a pyc file are nested. The function view in binja is flat and thus not suitable for displaying a tree structure. As of now, the plugin can be used on the raw bytecode stream. Steps for extracting the bytecode along with other directions can be found on the plugin page at GitHub.

https://github.com/extremecoders-re/bnpy

To conclude this short post, here is a GIF of the plugin in action.


Sunday, 15 October 2017

Flare-On Challenge 2017 Writeup

Flare-on is an annual CTF style challenge organized by Fire-eye with a focus on reverse engineering. The contest falls into its fourth year this season. Taking part in these challenges gives us a nice opportunity to learn something new and this year was no exception. Overall, there were 12 challenges to complete. Official solution to the challenges has already been published at the FireEye blog. Hence instead of a detailed write-up, I will just cover the important parts.

#1 - Login.html

The first problem was as simple as it gets. There is an HTML file with a form. We need to provide a flag and check for its correctness.

Figure 1: Check thy flag
The code simply performs a ROT-13 of the input and compares it with another string. To get back the flag, re-apply ROT-13.

Figure 2: ROT-13 again
Flag: ClientSideLoginsAreEasy@flare-on.com

Tuesday, 11 July 2017

Deobfuscating PjOrion using bytecode simplifier

Bytecode simplifier is a tool to de-obfuscate PjOrion protected python scripts. This post is a short tutorial to show how to use this module to deobfuscate a protected python script.

I have used the sample code below to demonstrate its usage. This is a small program to calculate the factorial of a number.

# Python program to find the factorial of a number using recursion
 
def recur_factorial(n):
   """Function to return the factorial
   of a number using recursion"""
   if n == 1:
       return n
   else:
       return n*recur_factorial(n-1)
 
 
# take input from the user
num = int(input("Enter a number: "))
 
# check is the number is negative
if num < 0:
   print("Sorry, factorial does not exist for negative numbers")
elif num == 0:
   print("The factorial of 0 is 1")
else:
   print("The factorial of",num,"is",recur_factorial(num))

Monday, 10 July 2017

Introducing bytecode simplifier

Bytecode simplifier is a tool to deobfuscate PjOrion protected python scripts. It is a complete rewrite of my earlier tool PjOrion Deobfuscator. I have reimplemented the deobfuscation functionality from scratch and have used networkx specifically for this purpose. Using networkx made reasoning about the code much simpler.
The PjOrion version used is 1.3.2 (Filename: PjOrion_Uncompyle6_01.10.2016.zip)

The code is at https://github.com/extremecoders-re/bytecode_simplifier

A short tutorial can be found here: https://0xec.blogspot.com/2017/07/deobfuscating-pjorion-using-bytecode.html

Friday, 31 March 2017

Remote debugging in IDA Pro by http tunnelling

IDA Pro provides remote debugging capability that allows us to debug a target binary residing on a different machine over the network. This feature is very useful in situations such as when we want to debug an executable for an arm device as installing IDA on it is not possible. IDA can remotely debug another binary in two ways - through a gdbserver or by the provided debugger servers (located in dbgsrv directory).

These debugging servers transport the debugger commands, messages and relevant data over a TCP/IP network through BSD sockets. So far so good, but what if the debugging server resided on a virtual host hosting multiple domain names? We cannot use sockets anymore.

A socket connection between two endpoints is characterized by a pair of socket addresses, one for each node. The socket address, in turn, comprises of the IP address and a port number. For an incoming socket connection, a server hosting multiple domains on the same IP address cannot decide which domain to actually forward the request based on socket address alone. Thus remote debugging using sockets is not possible. However, this is not entirely true as there are techniques such as port forwarding (aka virtual server) that can be used to reroute the incoming traffic to various private IPs based on a pre-decided table. Port forwarding capability is not available everywhere so we can ignore it for now. Instead, it would be much better if sockets supported connections based on domain names as described in this paper Name-based Virtual Hosting in TCP.

The Application Layer Protocol HTTP solves the virtual host problem by including the Host header in HTTP messages. It seems that if we can wrap the transport layer socket traffic in plain old HTTP messages our problem would be solved. The rest of the blog post describes this process in detail.

Sunday, 26 March 2017

67,000 cuts with python-pefile

EasyCTF featured an interesting reversing engineering challenge. The problem statement is shown in Figure 1.
Figure 1: Problem statement
A file 67k.zip was provided containing 67,085 PE files numbered from 00000.exe to 1060c.exe as shown in Figure 2.

67k files to reverse
Figure 2: 67k files to reverse!


Thursday, 16 March 2017

Hacking the CPython virtual machine to support bytecode debugging


As you may know, Python is an interpreted programming language. By Python, I am referring to the standard implementation i.e CPython. The implication of being interpreted means that python code is never directly executed by the processor. The python compiler converts the source code into an intermediate representation called as the bytecode. The bytecode consists of instructions which at runtime are interpreted by the CPython virtual machine. For knowing more about the nitty-gritty details refer to ceval.c.

Unfortunately, the standard python implementation does not provide a way to debug the bytecode when they are being executed on the virtual machine. You may question, why is that even needed as I can already debug python source code using pdb and similar tools. Also, gdb 7 and above support debugging the virtual machine itself so bytecode debugging may seem unnecessary.

However, that is only one side of the coin. Pdb can be used for debugging only when the source code is available. Gdb no doubt can debug without the source as we are dealing directly with the virtual machine but it is too low level for our tasks. This is akin to finding bugs in your C code by using an In-Circuit Emulator on the processor. Sure, you would find bugs if you have the time and patience but it is unusable for the most of us. What we need, is something in between, one which can not only debug without source but also is not too low-level and can understand the python specific implementation details. Further, it would be an icing on the cake if this system can be implemented directly in python code.

Tuesday, 14 February 2017

Extracting encrypted pyinstaller executables

UPDATE: For recent PyInstaller versions, the script below won't work. Please visit the pyinstxtractor wiki for more information.
 
It has been more than a quarter since the last post, and in the meantime, I was very busy and did not have the time to write a proper post. The good news is at the moment, I am comparatively free and can put in a quick post. 

As said earlier, PyInstaller provides an option to encrypt the embedded files within the executable. This feature can be used by supplying an argument --key=key-string while generating the executable. 

Detecting encrypted pyinstaller executables is simple. If  pyinstxtractor is used, it would indicate this as shown in Figure 1.

Trying to extract encrypted pyinstaller archive
Figure 1: Trying to extract encrypted pyinstaller archive

Wednesday, 9 November 2016

Flare-on Challenge 2016 Write-up


The Flare-on challenge is an annual CTF style challenge with a focus on reverse engineering. Official solutions have already been published, besides that there are other writeups available too, hence I will just skim through the parts.

Challenge #1

The first was simple. This is base64 encoding with a custom charset. This online tool does the job.
Flag: sh00ting_phish_in_a_barrel@flare-on.com

Fig 1: Challenge 1

Monday, 7 November 2016

Hack the Vote 2016 CTF - APTeaser writeup


Just for fun I decided to have a go at the Hack the Vote 2016 CTF, particularly the reversing challenges on Windows. There were two of them APTeaser & Trumpervisor. I managed to solve the first. I did try the second but it involved reversing a Win 10 kernel driver implementing a hypervisor using the Intel Virtualization Extensions (VT-x). Anyway, here is a somewhat detailed writeup for the first.

Initial Analysis

The provided file is a pcapng. Opening it in fiddler, reveals an interesting http request for a supposed pdf file on the domain important.documents.trustme, but as indicated from the Content-Type the response is actually an executable.

Serving an executable when all I want is a pdf
Fig 1: Serving an executable when all I want is a pdf

Sunday, 30 October 2016

A punched card reader in javascript

While trying out the Ektoparty CTF 2016 there was a challenge which requires to decode a series of punched card images. A punched card looks like this

A Punched Card
Fig 1: A sample punch card

Wednesday, 7 September 2016

Pyinstaller Extractor updated to v1.6

PyInstaller Extractor is a tool to extract the contents of a windows executable file created by pyinstaller. This weekend I updated the tool to version 1.6. The new features which were incorporated include

  • Support for extracting pyinstaller 3.2
  • Extractor would now use a random name for extracting unnamed files within the CArchive
  • Preliminary support for handling encrypted pyz archives
The features are explained below.

Support for extracting pyinstaller 3.2

There has not been any format changes between pyinstaller 3.2 and the earlier versions. The previous versions works as is for pyinstaller 3.2

Handling unnamed files within CArchive

A Pyinstaller exe file can be visualized as of two nested archives. The outer layer is called CArchive. It is called so as it handled by C code i.e. the decompression of the layer is handled by a native stub written in C. The CArchive in turn contain another archive called PYZArchive along with other files. The PYZArchive is usually zlib compressed and is handled by python code and hence the reason for its name.

The CArchive usually contains the main script along with necessary dll files and python extension modules (pyd files). When running an pyinstaller exe, all dll and pyd files are written to a temporary directory to facilitate loading. (This behaviour is noticeably different from py2exe which loads dlls from memory.) The main script is never written to disk and hence it is possible to remove its name. If such is the case then the earlier versions of extractor would fail. The current version 1.6 will use a random name if it finds any unnamed files.

This feature has mainly been inspired while working on the PAN LabyREnth challenge (Threat #7).

Preliminary support for handling encrypted pyz archives

The files within the PYZ archive can be encrypted too. If such is the case, the tool would dump those files as is without attempting to process them. Previously the tool would fail trying to decompress encrypted data.

That's it. I would make a separate post to demonstrate how to extract encrypted pyz archives. It isn't difficult as the key to decrypt is present right in the CArchive.

Saturday, 20 August 2016

LabyREnth CTF WriteUp - Random track


Attempting the Labyrenth challenges was an interesting experience. I completed three tracks - Windows, Docs & Random, and the others were left halfway. Among all the tracks, the random track was more interesting particularly due to the last python challenge.

Level 1 - Java

The challenge consists of a jar file. So it seems, we have to reverse java bytecode. The interesting thing is the jar will only run with Java 9 (currently in beta) as it uses StringConcatFactory. Attempting to decompile the file with Jad, Procyon, or CFR fails. This is due the fact it uses a new opcode InvokeDynamic. This is a fairly new opcode and as of now, the java compiler does not emit this opcode. It exists to support other dynamic languages running on the JVM. 

Only krakatau was able to decompile the file proper, although it too doesn't handle the InvokeDynamic opcode.
public class omg {
    String username;
    String levelFlag;
    
    public omg(String s)
    {
        super();
        this.levelFlag = "W5SSA2DPOBSSA6LPOUQGK3TKN54SA5DINFZSASTBOZQSAYLQOAQGC4ZAO5QXE3JNOVYC4ICUNBSSA4TFON2CA53JNRWCAYTFEBWXKY3IEBWW64TFEBZWK6DDNF2GS3THEEQFI2DFEBTGYYLHEBUXGICQIFHHWRBQL5MTA5K7IV3DG3S7IJQXGZJTGJ6Q!";
        this.username = s;
        if (s.contains((CharSequence)(Object)"-isDrunk"))
        {
            String[] a = s.split("-");
            int i = a[1].charAt(2);
            int i0 = Character.toUpperCase((char)i);
            int i1 = (char)(i0 ^ 15);
            this.levelFlag = /*invokedynamic*/null;
            StringBuilder a0 = new StringBuilder(this.levelFlag);
            int i2 = 0;
            while(i2 < 4)
            {
                Object[] a1 = new Object[1];
                int i3 = a[1].charAt(a[1].length() - 1);
                int i4 = (short)i3;
                a1[0] = Short.valueOf((short)i4);
                int i5 = (char)(Integer.parseInt(String.format("%04x", a1), 16) ^ 166);
                a0.append((char)i5);
                i2 = i2 + 1;
            }
            System.out.println(a0.toString());
            this.levelFlag = a0.toString();
        }
        else
        {
            int i6 = 0;
            while(i6 < s.length() / 2)
            {
                String s0 = this.levelFlag;
                int i7 = s.charAt(i6);
                int i8 = s.charAt(s.length() - 1);
                this.levelFlag = s0.replace((char)i7, (char)i8);
                i6 = i6 + 1;
            }
        }
    }
    
    public String getLevelFlag()
    {
        return this.levelFlag;
    }
    
    public static void main(String[] a)
    {
        omg a0 = new omg(System.getenv("Admin"));
        System.out.println(/*invokedynamic*/null);
    }
}
There is a whole bunch of decoy code. The actual flag  can be found by base32 decoding the levelFlag: 

W5SSA2DPOBSSA6LPOUQGK3TKN54SA5DINFZSASTBOZQSAYLQOAQGC4ZAO5QXE3JNOVYC4ICUNBSSA4TFON2CA53JNRWCAYTFEBWXKY3IEBWW64TFEBZWK6DDNF2GS3THEEQFI2DFEBTGYYLHEBUXGICQIFHHWRBQL5MTA5K7IV3DG3S7IJQXGZJTGJ6Q

Fig 1: Level 1 flag
This gives our flag: PAN{D0_Y0u_Ev3n_Base32}


Level 2 - Regex

This challenge looks scary at first sight. A regular expression is given. Our task is to find a string that does not match the regex. Netcatting the string to 52.27.101.106 would give the flag.

Fig 2: That looks scary, doesn't it?
The regex seems to match everything ever thrown at it. It has 625 clauses making it unfit for manual analysis. A regex debugger like RegexBuddy or regex101 is handy for such situations.

Lets look at the clause 1: .*[^0mglo8sc1enC3].*

This matches a single character unlimited number of times followed by a character which is not in the negation list, finally followed by a character unlimited number of times. Hence any string consisting of only characters present in the negation list will not match this clause.

Clause 2: .{,190}
Clause 3: .{192,}

The 2nd clause matches any string of length 190 or lower. The 3rd clause matches any string of length 192 or above. Combining these two clauses, for a non match our string should exactly 191 characters drawn from the list in clause 1.

The remaining clauses worth of interest is clause 124 and 341.
Clause 124
Fig 3: Clause 124
Clause 341
Fig 4: Clause 341
Clause 124 matches a string of length 190 chars followed by one of e0nlCo3c8. Similarly clause 341 matches a string of length 190 followed by one of mg1.

Combining the above clauses the string which does not match the regex consists of 190 g followed by a solitary s.
ggggggggggggggggggggggggggggggggggggggggggggggggggggggggggggggggggggggggggggggggggggggggggggggggggggggggggggggggggggggggggggggggggggggggggggggggggggggggggggggggggggggggggggggggggggggggggggggs

Netcatting this to 52.27.101.106 gives the flag PAN{th4t5_4_pr311y_dum8_w4y_10_us3_r3g3x}

Fig 5: Level 2 flag

Level 3 - Pcap

A pcap file is provided. Loading it in Wireshark reveals something interesting with the tcp sequence number of the SYN packets. The sequence numbers starts with PK\03\04 which is also the magic signature for zip files. We can set a display filter will only display the SYN packets. The same can be used to save the filtered packets to a new pcap file.

ZIP signature in tcp sequence number
Fig 6: ZIP signature in tcp sequence number
To assemble zip file by combining the sequence number, we can use scapy.
from scapy.all import *
from binascii import unhexlify
import cStringIO

def main():
    buf = cStringIO.StringIO()
    with PcapReader('SYN-filtered.pcap') as pcap_reader:
        for pkt in pcap_reader:                                 
                buf.write(unhexlify(format(pkt.seq, 'x').zfill(8)))
    open('extracted.zip', 'wb').write(buf.getvalue())   
            
if __name__ == '__main__':
    main()

This creates a new file extracted.zip. This zip contains 853 files each containing base64 encoded text.

Contents of zip file
Fig 7: Contents of zip file
Our task is to join the files in the correct order to form a huge base64 text blob. Decoding that text blob should give us our flag. The padding character used in base64 is =. Grepping for the = character within the extracted BIN files gives one hit 339.bin. This should therefore be the last file in the combined blob.
339.bin
Fig 8: 339.bin
The other point to note is that the contents of the files overlap as in Fig 9 showing the overlapped part of 531.bin with 339.bin.

Overlapped part
Fig 9: Overlapped part
We can write a python script which would find the order of assembling the files by searching for the overlapped part.
import re

def findMatch(dct, txt):
    for i in xrange(len(txt)-1, 0, -1):
        reg = re.compile(re.escape(txt[0:i])+'$')

        for key in dct.keys():
            if reg.search(dct[key]):
                return (key, i)

    return (None, -1)


def main():
    contents = dict()

    for i in xrange(853):
        fname = '%d.txt' %i
        txt = open(fname).read()
        contents[fname] = txt

    nm = '339.txt'
    print nm

    while True:
        txt = contents[nm]
        result, matchlen = findMatch(contents, txt)

        if result == None:
            break
            
        print result, matchlen
        del contents[nm] 
        nm = result


if __name__ == '__main__':
    main()
Running this gives the order of joining the files in reverse i.e the first line (339.txt) is the last file and the line (659.txt) is the first file. Each line contains two comma separated values. The second value is the number of overlapping characters. The full list is available as a gist.

Based on the join order, another python script can assemble the files.
f = open('combined.txt', 'w')
lines = open('random-lev3-joinorder.txt', 'r').readlines()

try:
    for line in reversed(lines):
        fname, matchlen = line.split(' ')
        matchlen = int (matchlen)

        txt = open(fname, 'r').read()
        f.write(txt[0:len(txt)-matchlen])

except:
    f.write(open('339.txt', 'r').read()) # last file has no overlap

f.close()
The assembled file, combined.txt is a base64 text blob. Decoding it results in a zip file. The zip file has several images within.
One of them troll_cloud.png contains the flag:  PAN{YouDiD4iT.GREATjob}
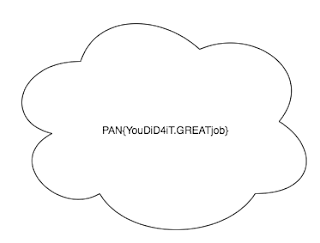
Level 3 flag
Fig 10: Level 3 flag

Level 4 - PHP

The challenge consists of solving a maze. The maze is coded in PHP and is additionally heavily obfuscated. For running this, I had to set up wamp server in my windows virtual machine. The actual php code which we are after is dynamically generated and eval'd. Getting around this obfuscation was easy as PHP was configured with display errors to be true. This made it to spit out the eval'd php code as a warning message.

Dynamically generated php code
Fig 11: Dynamically generated php code
To copy the de-obfuscated php code, we need to use a tool like fiddler. We cannot directly copy the php code from the warning message as the characters are not escaped properly. The deobfuscated source can be found here. From this point it is a matter of manual source code analysis to find the correct path for solving the maze. Solving the maze gives the flag:
 PAN{Life is a maze of complications. Also, puppets are sometimes involved. Deal with it.}

Fig 12: Level  4 flag

Level 5 - Python

Level 5 challenge - Crack APT Maker Pro
Fig 13: Level 5 challenge - Crack APT Maker Pro
This the final challenge in the Random track and is the most interesting. As the description of the challenge points out we really "have to be a snake charmer to crack the newest version of APT Maker Pro". The file is a 720 KB python script which contains a zlib compressed marshalled code object which is dynamically executed by the exec statement as shown in Fig 14.
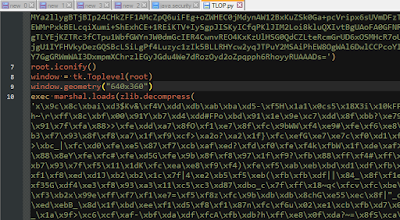
Dynamically executed payload
Fig 14: Dynamically executed payload
To proceed, we need the decompiled payload from the compressed code object. This is easy and my tool Easy Python Decompiler is sufficient for the task. First, decompress the zlib data into a new file, add the python magic header 03 F3 0D 0A 00 00 00 00 at the beginning, and finally feed it to the decompiler to get our decompiled source as shown in Fig 15.

Decompiled payload
Fig 15: Decompiled payload
However that is not all. The decompiled payload contains a base64 encoded, zlib compressed code object which is executed by the exec statement just like the previous case. In addition to this there is a piece of RC4 encrypted data labelled as malware as shown in Fig 16. Thus the actual challenge is to find the correct RC4 decryption key. To find the key, we need to inspect the second level payload just found.
Fig 16: The malware blob
The difficulty at this stage increases rapidly. We cannot decompile the second level payload as it has been obfuscated. A deep knowledge about CPython internals is necessary to proceed forward. As I said, the payload is no longer decompilable, hence we need to inspect it manually. Let's inspect the code object.
>>> import marshal
>>> f = open('level2.pyc', 'rb')
>>> f.seek(8)
>>> co = marshal.load(f)
>>> co.co_consts
(<code object verify_license at 00AAB2F0, file "", line -1>, None)
The code object contains another nested code object verify_license which sounds interesting. Lets dump it to a new file.
>>> of = open('level3.pyc', 'wb')
>>> of.write('\x03\xF3\x0D\x0A' + '\x00' * 4)
>>> marshal.dump(co.co_consts[0], of)
>>> of.close()

Now we need to analyze 3rd level payload level3.pyc. Similar to level2.pyc this is too obfuscated and undecompileable. Lets run some preliminary analysis.
>>> f = open('level3.pyc', 'rb')
>>> f.seek(8)
>>> co=marshal.load(f)
>>> len(co.co_consts)
37173
>>> len(co.co_names)
37124
>>> len(co.co_code)
144060
That's more than 37k constants and names!. In addition the size of bytecode instructions that gets actually executed is over 144k. Thats insane!. Who would like to analyze such a file manually unless one have tools and luckily we do have tools. Out of the 37173 constants, 37121 just store the None type and is redundant. We can write a quick python script for finding this.
>>> for i in xrange(len(co.co_consts)):
...     if co.co_consts[i] is not None:
...             print i
...             break
...
37121
The 37122th constant stores a png file which looks interesting.
>>> co.co_consts[37122][:6]
'\x89PNG\r\n'
Fig 17: Embedded PNG file
The remaining constants store various integers and are not of much interest. Lets shift our focus to the 144k long co_code. Lets disassemble the very first instruction,
>>> import opcode
>>> opcode.opname[ord(co.co_code[0])]
'EXTENDED_ARG'

That's the EXTENDED_ARG opcode. In normal python, it is very rare to encounter this opcode. This is only generated if the operand of the instruction cannot fit in a space of 2 bytes. This can happen in rare situations such as passing more than 65,535 parameters to a function. The actual opcode on which EXTENDED_ARG is operating on is located at a offset of +3. Lets see what it is.
>>> opcode.opname[ord(co.co_code[3])]
'EXTENDED_ARG'
That's even more strange. We expected to see a real opcode here. If we continue this way, we will see a huge chain of EXTENDED_ARG opcodes and the final instruction which it is operating on is a JUMP_FORWARD which as the name suggests increments the IP by an offset.
>>> opcode.opname[ord(co.co_code[144051])]
'EXTENDED_ARG'
>>> opcode.opname[ord(co.co_code[144054])]
'EXTENDED_ARG'
>>> opcode.opname[ord(co.co_code[144057])]
'JUMP_FORWARD'

To find out the target offset of the jump we need to write a python script.
import marshal

f=open('level3.pyc', 'rb')
f.seek(8)
co=marshal.load(f)
f.close()

i = 0
arg = 0
while i < len(co.co_code):
 arg = (arg << 16) | ord(co.co_code[i+1]) | (ord(co.co_code[i+2]) << 8)
 arg = arg & 0xFFFFFFFF  
 i += 3

print hex(arg)
Running this gives us the target offset which is 0xfffdcd45 or -1,44,059. That is instead of jumping forward it jumps backward within the instruction stream. The obfuscation that is applied is akin to overlapping instruction obfuscation found in native x86 executables.

Now the size of the instruction stream (co_code) is 144060 and a 144059 long backward jump from the rear leads to the second byte. If we disassemble this we uncover a hidden series of instructions stitched together with JUMP_FORWARDs.
>>> opcode.opname[ord(co.co_code[1])]
'LOAD_NAME'
>>> opcode.opname[ord(co.co_code[4])]
'NOP'
>>> opcode.opname[ord(co.co_code[5])]
'JUMP_FORWARD'

We need to uncover this hidden instructions, join them as one after removing the NOP and JUMP_FORWARD instructions used for stitching them. Another python script to the rescue.
# level3 extract code

import marshal
import opcode
import types

cleaned_bytecode = []


def clean(opkode, arg1, arg2):
    if opcode.opname[opkode] == 'JUMP_FORWARD' or opcode.opname[opkode] == 'NOP':
        return

    else:
        if opkode >= opcode.HAVE_ARGUMENT:
            cleaned_bytecode.append(opkode)
            cleaned_bytecode.append(arg1)
            cleaned_bytecode.append(arg2)
        else:
            cleaned_bytecode.append(opkode)


def printline(offset, opname, arg):
    if opname == 'JUMP_FORWARD' or opname == 'NOP':
        return
    if arg is not None:
        print 'loc_%06d: %s %d' %(offset, opname, arg)
    else:
        print 'loc_%06d: %s' %(offset, opname)


def modifyCodeStr(code_obj):
    co_argcount = code_obj.co_argcount
    co_nlocals = code_obj.co_nlocals
    co_stacksize = code_obj.co_stacksize
    co_flags = code_obj.co_flags

    # new code string
    co_codestring = ''.join(map(chr, cleaned_bytecode))

    # Replace png file contents to facilitate decompiling
    co_constants = list(code_obj.co_consts)
    co_constants[37122] = 'PNG FILE HERE'
    co_constants = tuple(co_constants)

    co_names = code_obj.co_names
    co_varnames = code_obj.co_varnames
    co_filename = code_obj.co_filename
    co_name = code_obj.co_name
    co_firstlineno = code_obj.co_firstlineno
    co_lnotab = code_obj.co_lnotab

    return types.CodeType(co_argcount, co_nlocals, co_stacksize, \
                          co_flags, co_codestring, co_constants, co_names, \
                          co_varnames, co_filename, co_name, co_firstlineno, co_lnotab)

def main(): 
    f=open('level3.pyc', 'rb')
    f.seek(8)
    co=marshal.load(f)
    f.close()
    kode = map(ord, list(co.co_code))
    offset = 1

    while offset < len(kode):
        opkode = kode[offset]
        opname = opcode.opname[opkode]

        if opkode >= opcode.HAVE_ARGUMENT:
            arg1 = kode[offset+1]
            arg2 = kode[offset+2]
            arg = (arg2 << 8) | arg1 # Little endian
            printline(offset, opname, arg)
            offset += 3

        else:
            arg = arg1 = arg2 = None
            printline(offset, opname, arg)
            offset += 1

        clean(opkode, arg1, arg2)

        if opname == 'JUMP_FORWARD':
            offset += arg

        elif opname == 'RETURN_VALUE':
            break

    newCodeObj = modifyCodeStr(co)
    f = open('level3_deobf.pyc', 'wb')
    f.write('\x03\xF3\x0D\x0A' + '\x00'*4)
    marshal.dump(newCodeObj, f)
    f.close()


if __name__ == '__main__':
    main()

The hidden instruction stream can be found here. The python script above stitches the hidden code and replaces the PNG file contents with a dummy string to facilitate decompiling, else decompiler would choke. Lets decompile the produced level3_deobf.pyc selecting pycdc as the engine. It gives the following code.
# File: l (Python 2.7)

   = license_key[0]
    = 'PNG FILE HERE'[542]
exec       =    ==    

   = license_key[1]
    = 'PNG FILE HERE'[379]
exec       =    ==    

   = license_key[2]
    = 'PNG FILE HERE'[1020]
exec       =    ==    

   = license_key[3]
    = 'PNG FILE HERE'[457]
exec       =    ==    

   = license_key[4]
    = 'PNG FILE HERE'[203]
exec       =    ==    

   = license_key[5]
    = 'PNG FILE HERE'[203]
exec       =    ==    

   = license_key[6]
    = 'PNG FILE HERE'[39]
exec       =    ==    

   = license_key[7]
    = 'PNG FILE HERE'[379]
exec       =    ==    

   = license_key[8]
    = 'PNG FILE HERE'[65]
exec       =    ==    

   = license_key[9]
    = 'PNG FILE HERE'[54]
exec       =    ==    

   = license_key[10]
    = 'PNG FILE HERE'[379]
exec       =    ==    

   = license_key[11]
    = 'PNG FILE HERE'[40]
exec       =    ==    

   = license_key[12]
    = 'PNG FILE HERE'[262]
exec       =    ==    

   = license_key[13]
    = 'PNG FILE HERE'[54]
exec       =    ==    

   = license_key[14]
    = 'PNG FILE HERE'[379]
exec       =    ==    

   = license_key[15]
    = 'PNG FILE HERE'[250]
exec       =    ==    

   = license_key[16]
    = 'PNG FILE HERE'[704]
exec       =    ==    

   = license_key[17]
    = 'PNG FILE HERE'[1110]
exec       =    ==    

   = license_key[18]
    = 'PNG FILE HERE'[141]
exec       =    ==    

   = license_key[19]
    = 'PNG FILE HERE'[379]
exec       =    ==    

   = license_key[20]
    = 'PNG FILE HERE'[65]
exec       =    ==    

   = license_key[21]
    = 'PNG FILE HERE'[54]
exec       =    ==    

   = license_key[22]
    = 'PNG FILE HERE'[285]
exec       =    ==    

   = license_key[23]
    = 'PNG FILE HERE'[1215]
exec       =    ==    

   = license_key[24]
    = 'PNG FILE HERE'[840]
exec       =    ==    

  =   &   &   &   &   &   &   &   &   &   &   &   &   &   &   &   &   &   &   &   &   &   &   &   &   &  

The variable names are missing, but it is fairly evident what the code does. It compares the characters of the license key with some bytes of the PNG file. For success, each of these checks must succeed. Joining the characters we get the  license key 1_W4nnA_b3_Th3_vERy_b3ST!. Feeding this, APT Maker Pro becomes registered as shown in Fig 18.
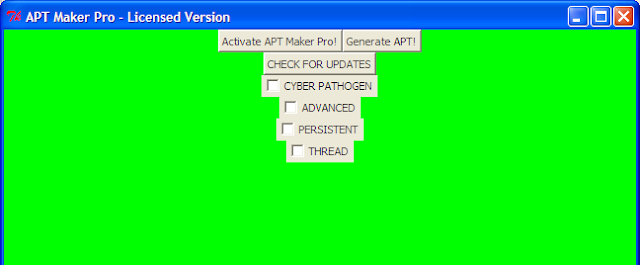
APT Maker Pro is licensed
Fig 18: APT Maker Pro is licensed
Clicking on Generate APT drops the malware payload as EVIL_MALWARE_ CYBER_PATHOGEN .pyc. Decompiling it we get the file containing the flag for this level 
PAN{l1Ke_n0_oN3_ev3r_Wa5}

Fig 19: The flag